1. Create a directory named GWTSample (I will refer to it as GWT_Sample_DIR).
2. In the command prompt go to the GWT home and run following instruction :
applicationCreator.cmd -out GWT_Sample_DIR com.saeed.SampleGWT.client.HelloGWT
3. The above step will create the folder structure and generate several files in the GWT_Sample_DIR.
4. In the Netbeans create Java Project with Existing Source.
5. In the step 3 add GWT_Sample_DIR directory in source package folder.

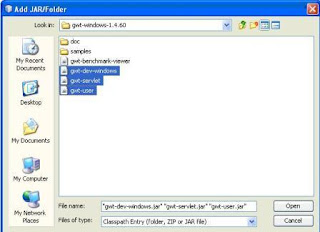
6. Add 3 jar file from GWT home .
gwt-dev-windows.jar
gwt-servlet.jar
gwt-user.jar
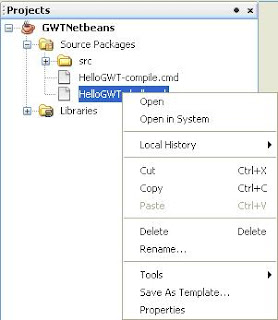
7. You can use Open in System like bellow image to use GWT .cmd file.
4. In the Netbeans create Java Project with Existing Source.
5. In the step 3 add GWT_Sample_DIR directory in source package folder.

6. Add 3 jar file from GWT home .
gwt-dev-windows.jar
gwt-servlet.jar
gwt-user.jar

7. You can use Open in System like bellow image to use GWT .cmd file.

Tip :
Don’t run project from Run button in Netbeans for running project you must using xxx-shel.cmd.
Don’t care to package error in HelloGWT.java file .
please insert ur comment.
bye all


